
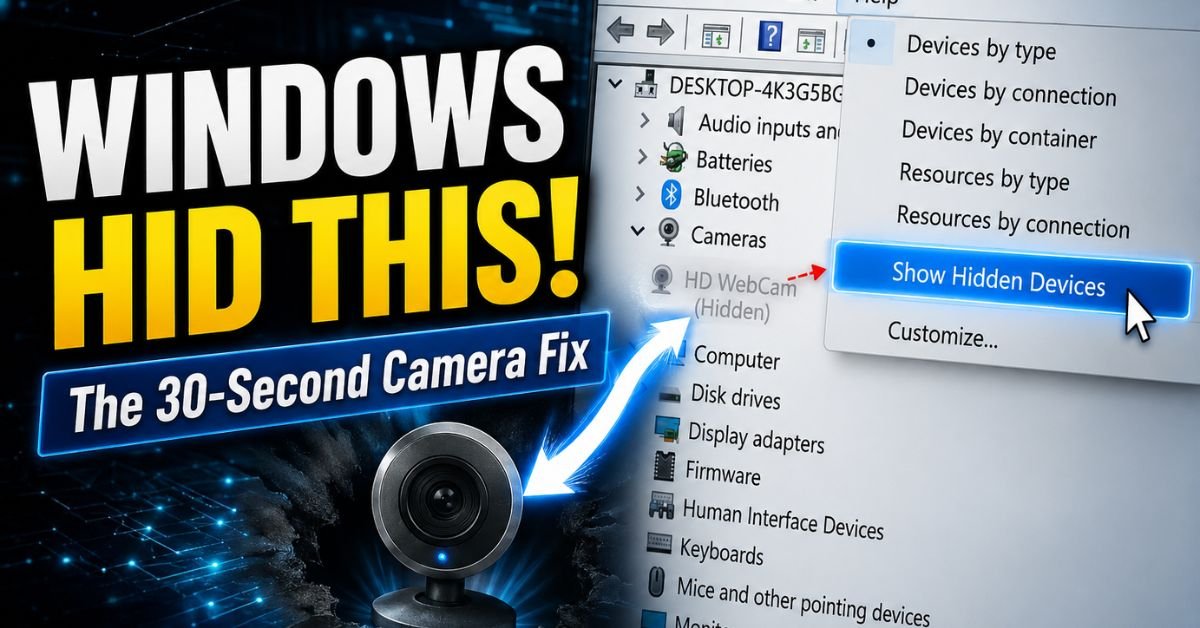
If your camera is not showing up in device manager has you stuck, the fastest fix is to enable “Show hidden devices” under the View menu, since Windows often hides disconnected camera drivers instead of deleting them. If that doesn’t work, check privacy permissions, update the driver, or scan for hardware changes to force Windows to redetect it.
Why Is My Camera Missing from the Device Manager?
When your camera is not showing up in Device Manager, it almost always points to one of three things: a driver problem, a hidden device entry, or a setting blocking the camera at the system level.
When Windows updates, it sometimes wipes out the camera driver without installing a replacement. Other times, the device is technically still there, but Windows has marked it as “hidden” because it’s not currently detected as active. And occasionally, the issue isn’t hardware-related at all; privacy settings or a BIOS-level toggle can make the camera invisible to the OS entirely, even though the physical hardware is fine.
The good news? Most of these fixes take less than five minutes. Let’s start with the easiest one.
Fix 1: Show Hidden Devices in Device Manager
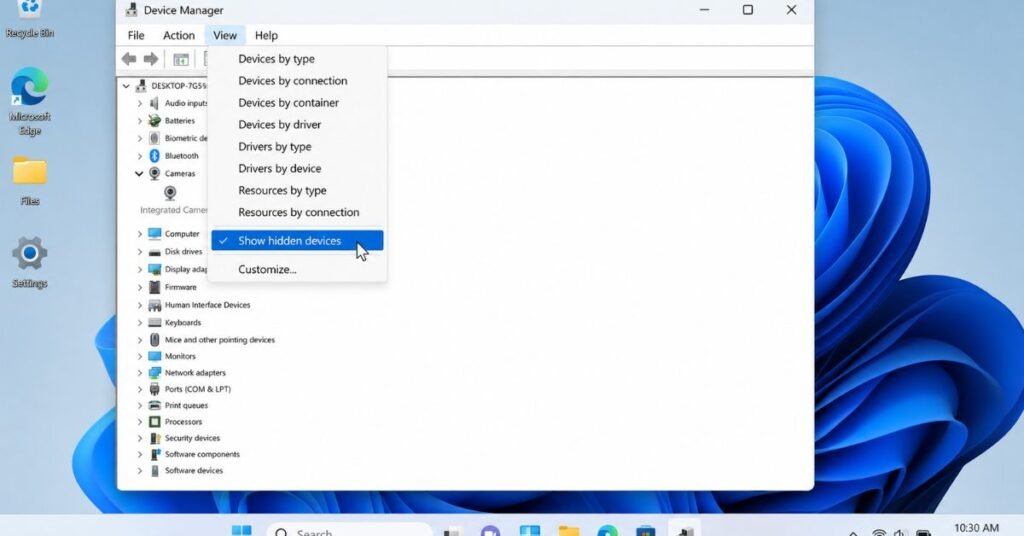
By default, Device Manager only shows devices Windows considers “currently connected.” If your camera driver got disconnected during a Windows Update, it might still be sitting there just hidden.
1. Press Windows key + X and select Device Manager.
2. Click the View menu at the top.
3. Select Show hidden devices.
4. Expand the Cameras or Imaging Devices category (sometimes it’s under Sound, video and game controllers on older systems).
5. Look for a grayed-out entry with your camera’s name, or anything labeled “Integrated Camera” or “Webcam.”
If you see it grayed out, right-click it and select Enable device. Then restart your laptop and check if the camera works again.
If nothing shows up even with hidden devices revealed, move on to Fix 2.
Fix 2: Check Camera Privacy Permissions
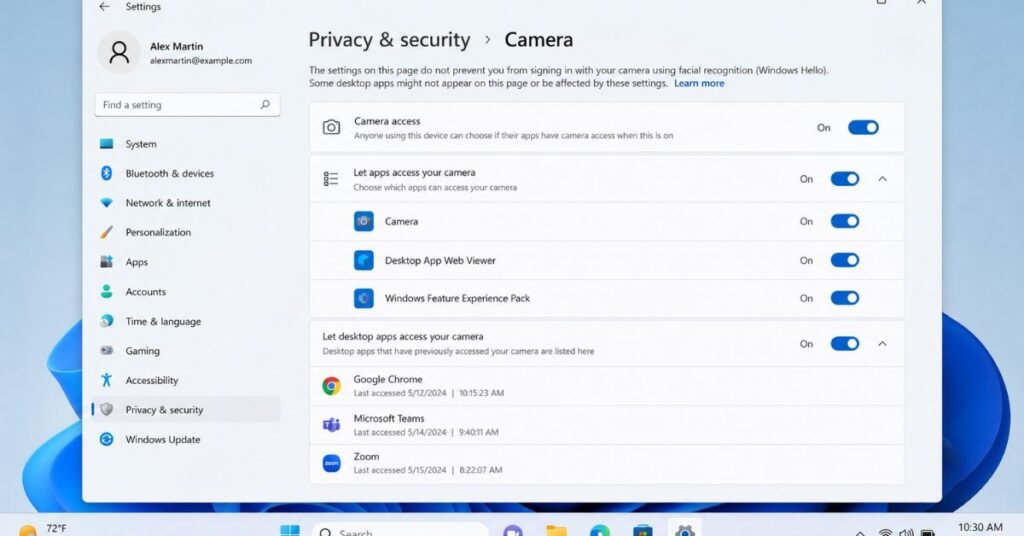
This one trips up a lot of people because it has nothing to do with drivers, it’s a software switch that controls whether apps (and sometimes Windows itself) can access the camera.
1. Open Settings (Windows key + I).
2. Go to Privacy & security (Windows 11) or Privacy (Windows 10).
3. Click Camera under “App permissions.”
4. Make sure Camera access is turned On.
5. Scroll down and confirm individual apps you want to use (like Zoom, Teams, or the Camera app) are also toggled on.
While you’re here, check Let desktop apps access your camera too. This is a separate toggle from the general one, and missing it is a common reason apps can’t see the camera even when Windows can.
If permissions look fine but the camera still doesn’t appear in Device Manager, the issue is likely driver-related. Skip ahead to Fix 4.
Fix 3: Run the Windows Camera Troubleshooter
Windows has a built-in troubleshooter that automatically checks for common camera issues and can fix some of them without you lifting a finger.
1. Open Settings and go to System > Troubleshoot > Other troubleshooters (Windows 11), or Update & Security > Troubleshoot > Additional troubleshooters (Windows 10).
2. Find Camera in the list and click Run.
3. Follow the on-screen prompts. The tool will scan for driver issues, check permission settings, and attempt automatic repairs.
4. Once it finishes, restart your computer.
This troubleshooter won’t fix everything, but it’s worth running early since it can catch issues you might not think to check manually like a corrupted driver registry entry.
Fix 4: Update or Reinstall the Camera Driver
This is the fix that solves the problem most often, especially after a Windows Update. If your camera driver is missing in Windows 10 or 11, reinstalling it usually brings everything back.
1. Open Device Manager (Windows key + X, then select it).
2. Expand Cameras, Imaging Devices, or Sound, video and game controllers.
3. Right-click your camera entry (if visible) and select Update driver.
4. Choose Search automatically for drivers and let Windows look for an update.
If no camera shows up at all, even after Fix 1:
1. Click Action at the top of Device Manager.
2. Select Scan for hardware changes (we’ll cover this more in Fix 6).
3. If the camera reappears, right-click it and choose Uninstall device.
4. Restarting your PC Windows will often reinstall the driver automatically on boot.
For laptops, downloading the driver directly from the manufacturer’s site usually works better than Windows’ generic driver. We’ll cover HP, Dell, and Lenovo specifics later in this post.
Outdated drivers don’t just affect your camera they can slow down your whole system too. If your PC has been feeling sluggish on startup lately, check out our guide on how to speed up a slow Windows 11 startup.
One more option: if the camera worked fine before a recent update and broke right after, try Roll Back Driver. Right-click the camera entry, go to Properties > Driver tab, and click Roll Back Driver if the option is available (it’s grayed out if no previous driver version is stored).
Fix 5: Add the Camera as Legacy Hardware
If your camera is genuinely not detected by Windows at all, not even as a hidden device you can manually tell Windows to look for it using the legacy hardware wizard. This is more of a last-resort step, but it works surprisingly often for built-in laptop cameras that Windows fails to auto-detect.
1. Open Device Manager.
2. Click Action > Add legacy hardware.
3. Click Next on the welcome screen.
4. Select Search for and install the hardware automatically and click Next.
5. Wait while Windows scans for any undetected devices. This can take a minute or two.
If Windows finds your camera, it’ll install the driver automatically. If it doesn’t find anything, you’ll need to select the hardware type manually (choose Imaging devices) and pick your camera model from a list though this only works if you know the exact model name.
Fix 6: Scan for Hardware Changes
This is the digital equivalent of “have you tried turning it off and on again” but it actually works more often than you’d expect.
1. Open Device Manager.
2. Click the Action menu.
3. Select Scan for hardware changes.
Windows will quickly re-scan all connected hardware and try to redetect anything missing. If your camera reappears after this, it’ll often install a driver automatically within a few seconds.
This is also a good step to run after any of the fixes above, just to confirm Windows has properly registered the changes.
Fix 7: Check for a Physical Camera Disable Shortcut
Here’s one that catches a lot of people off guard: many laptops have a physical camera shutter or a keyboard shortcut that disables the camera at the hardware level and if it’s switched off, Windows won’t even see the camera exists, let alone show it in Device Manager.
1. Check the top edge of your laptop screen for a small sliding shutter that physically covers the camera lens.
2. Look at your function key row (F1–F12) for an icon that looks like a camera with a line through it usually combined with the Fn key.
3. On some laptops, this shortcut is Fn + F6, Fn + F10, or similar, depending on the manufacturer.
If your laptop has this feature and it’s accidentally been toggled off, pressing the shortcut again (or sliding the shutter back) should make the camera reappear in Device Manager almost instantly, no driver fix needed.
📌 Note for Surface Pro and HP EliteBook users: These devices sometimes have camera-related settings buried in the BIOS/UEFI firmware rather than Windows itself. If none of the fixes above work, restart your device, enter BIOS setup (usually by pressing F2, F10, or Delete during boot), and look for a section labeled Security or Built-in Device Options. Make sure the camera isn’t disabled at the firmware level; this is a known issue on certain EliteBook and Surface Pro models after BIOS updates.
Does This Apply to HP, Dell, and Lenovo?
Yes and each manufacturer has its own quirks worth knowing about.
HP laptops often use HP’s own camera driver instead of the generic Windows one. If Fix 4 doesn’t work, visit HP Support Assistant or the HP driver download page, search your exact model number, and look for “HP TrueVision HD Camera” or similar under the driver list.
Dell machines sometimes require the Dell Update utility to properly reinstall camera drivers the generic Windows driver can install but not function correctly. Search “Dell [your model] camera driver” on Dell’s support site for the correct version.
Lenovo laptops, especially ThinkPads, often have a separate utility called Lenovo Vantage that controls camera privacy settings independently of Windows. If your camera shows in Device Manager but won’t activate, check Vantage’s camera settings first it can override Windows-level permissions.
In all three cases, downloading the manufacturer-specific driver tends to work better than relying on Windows Update alone.
FAQs About Camera Missing from Device Manager
Why can’t I find my camera in Device Manager?
The most common reasons are a hidden device entry (fixed by enabling “Show hidden devices”), a driver that got removed during a Windows Update, or a physical camera disable switch that’s turned off. Less commonly, it can be a BIOS setting that’s disabled the camera at the firmware level.
How do I add a camera that’s not in Device Manager?
Try the “Add legacy hardware” option under the Action menu in Device Manager this forces Windows to search for undetected devices and can sometimes locate a camera that wasn’t showing up before. If that doesn’t work, “Scan for hardware changes” is worth trying too, since it often redirects missing hardware automatically.
Camera shows in Device Manager but still not working?
If the camera appears but apps still can’t access it, check your privacy permissions first (Fix 2) this is the most common cause. If permissions look fine, try updating or reinstalling the driver (Fix 4), since a corrupted driver can sometimes show up in Device Manager without actually functioning.
Most camera issues come down to a driver hiccup, a hidden device entry, or a permission toggle that got flipped during an update. Work through these fixes in order, and there’s a good chance your camera will be back within a few minutes. If you’re still stuck after trying all seven, it might be worth checking with your laptop manufacturer’s support page for model-specific driver downloads.